Pages

Showing posts with label recipes. Show all posts

Wednesday, August 24, 2011

something in the air

Can you feel it?

There's a chill in the air that has me wearing socks in the evening, and snuggling up closer to my husband at night. It has me wearing a sweater out to the chicken coop in the early morning, and craving the tastes of autumn.

I know. It's still summer. Technically. But the temperature in the evening is just a few degrees shy of woodstove-weather, and I find myself leaning eagerly towards those cozy fall evenings of reading and knitting in the kitchen.

For now, I will settle for a taste of something I don't make in the heat of summer:

Soup.

Today is our CSA pickup day, which means I have to use up last week's produce to make way for fresher fare. Three chairs pushed up to the island, three little paring knives, and at least three admonitions to be careful!
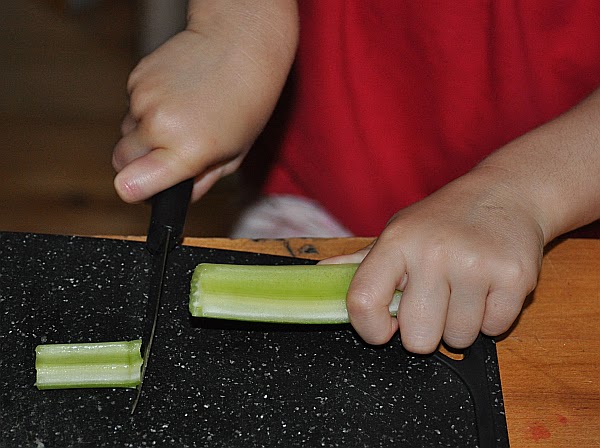
Celery is an easy thing for small hands to slice.

Mama cuts the onions to save little eyes from more tears than usual.

Carrots...

and zucchini are all added to the pot, sauted in coconut oil, with salt, pepper, and basil, till tender. Add six cups of stock, 3/4 cups yellow split peas, and 1/2 cup of rice. Simmer for 45 minutes, then whiz up till smooth. I have a feeling my children will proudly eat this soup without complaint, since they had a hand in its creation.

Their cooking zeal was not quite quenched, so out Jude went to gather apples from our old tree. With much paring and carving out of brown spots, we had enough to create a crisp topped with flour, brown sugar, rolled oats, cinnamon, and butter.

When the older two headed out to gift the chickens with all our seeds, peels, carrot ends and onion tops, someone was left behind to ensure that the apple crisp spoon was not neglected. Let no spoon go unlicked is her motto in the kitchen.


Lest you think, "Oh, her life is so idyllic! Her children are so responsible! She always says yes when her kids ask to help!", let me just add that Violet cut herself while slicing an apple, and wept, "I can see my skeleton! I can see the inside of my body!" (it wasn't quite THAT deep, but this girl does have a flair for the dramatic), and Jude protested mightily (for over an hour) when I confiscated his knife after I caught him wielding it, machete-like, over an innocent apple). We talked again about safety, and he announced that I am the meanest mother in the world for NOT letting him cook.

Still, the mouth-watering scent of apple crisp cooking on this cool evening more than makes up for the tears and the mess and the patience  required when cooking with children.

Friday, May 13, 2011

A New Heroine

 I'm almost in tears writing this, because I just baked these:


nut butter-and-jelly cookie cups

and when the kids came in, Violet said, "Can I have a cookie?". I said yes. Then Jude said, "Can I have one, too?" His expectant little freckle-face searched mine for the word that I sometimes cannot say because of his gluten and dairy intolerance:

Yes.

I used to bake, a lot. In our home, baking is synonymous with love and comfort. I remember coming home from school and finding the kitchen table covered with cookies sitting on a layer of newspaper. The greasy rings left behind spoke of home.

I rarely bake anything now because I hate to say "no" to him when the girls can eat it, and have found that gluten-free substitutes just don't make the cut. Without butter and the sticky, binding qualities of gluten, baking is often tasteless, gritty, or just...blech. It can taste like dried peas (if it contains chickpea flour), crumbles into a million pieces, or makes your tongue feel weird.

Last week I hit a wall. I do the majority of the cooking and feeding around here, and with a gf/df child, a picky preschooler, a husband who always feels underweight, I feel like I need the skills of a specialist, when really, I'm just a mom trying to work, garden, farm, knit, and sometimes sleep. My husband came home and no dinner was made and I made him take the kids out to the chip stand for fries. I stayed home and ate a scrambled egg. I was at the end of the line, after having spent too much money on mixes and substitutes that just didn't satisfy.

I knew there had to be something I was missing, but I don't have the know-how (or the time or discipline) to experiment with flours, starches and gums to come up with the best gluten-free flour blend.

Lucky for me, Silvana Nardone has done if for me! Author of "Cooking for Isaiah", Silvana tested and experimented and perfected gluten and dairy free cooking. I just got her cookbook and have made three recipes from it since yesterday: Sloppy Joe Stuffed Potato Skins, homemade pizza crust, and the cookies you see above.

Not only did all three recipes get rave reviews from Jude, they were also enthusiastically eaten by everyone else! The cookies are everything you want from a cookie: sweet and a bit salty, crispy on the outside, dense and chewy on the inside. Unbelievable.

I asked my hubby to pose for a shot. I told him to act sexy while eating the cookie. He wasn't sure what that meant, but I'd say he nailed it, wouldn't you?

Porn for moms of gluten-free kids: exhausted-looking dad enjoys homemade cookie.

So, I am now following the church of Silvana. She's helped me out of a rut, inspired me, and has made me a heroine in my son's eyes, just because I made a delicious cookie that he, too, can eat.

Friday, April 29, 2011

Sugaring Off: Maple Taffy

When the sap has been collected and the evaporators are at work, there might be a lull where you can enjoy the fruits of your labour.
Pat down some of that melty, crystalline snow you find in Spring. We used a garbage can lid, but you can do this on a cookie sheet if you want to try it at home!

Gather some sticks.

 Boil the syrup until it reaches the soft-ball stage (it clings into a little ball when dripped into a glass of cold water). Pour it in strips across the snow, then let it sit for a minute. Before it hardens completely, take your stick and squish it into one end of the maple strip...now roooollll the strip up onto your stick! (Check out Jude's look of anticipation!)

Pass quickly to the nearest child. Ignore the warnings that the tooth fairy is whispering in your ear about your child's dental health. Making maple taffy outside is the clearest memory I have of my childhood visits to a sugar shack.

Gooey, sticky, sweetness dabbed with bits of ice and snow...incomparable and unforgettable!

Saturday, December 18, 2010

Mama's Elves

Sigh. You know that sigh, the one you may suppress each time your children follow the question "What are you doing, mommy?" with "Can I help?". The sigh that suggests the indicated task just might get done in less time, with less mess, if you could just do it yourself...

I've done a lot of sighing this Christmas season. Untangling lights. Decorating the tree. Making gifts and cards. Wrapping said gifts. But I almost always say yes. This is what memories are made of, after all.

My older sister, wise woman that she is, told me to let myself off the hook when it comes to baking this year. She suggested I go and BUY cookies! They're cheap, they're good, and my kids don't really know the difference yet. I may follow her up on that suggestion, but it just wouldn't feel like Christmas here without at least one batch of sugar cookies.

You can tell that I copied this down as my mom dictated it to me over the phone! Here it is in clearer language:
Cream together 1 cup Crisco shortening and 1 cup white sugar. Then add 1 egg, slightly beaten, and 1 tsp. vanilla extract.
In a separate bowl, combine 2 1/2 cups flour2 tsp. cream of tartar, 1 tsp. soda,, and 1/2 tsp salt.
Mix two bowls together. Roll to about 1/4 inch thick, cut, and bake at 325 degrees F for 10 minutes. Cool on rack, then decorate with icing sugar/water glaze (add colour if you wish). Go crazy with the sprinkles!

While you bake, allow your toddler to hang off the pockets of your jeans.

And allow your preschooler to "paint her nails" with the icing, then lick it all off.

Finally, give full creative license to your little decorators!

A memory we'll cherish in years to come, because once again, (albeit through gritted teeth), I said yes.

Monday, November 1, 2010

Culinary Adventures

They say that one of the hardest things to say is "I'm sorry".

If this is true, then the second hardest thing to say is "Yes".

There are so many appropriate reasons to say no. No, you can't watch another movie. No, you can't eat hotdogs for every meal. No, playing with a saw is not safe.

But let's face it: often we say no just to save ourselves the mess we know will ensue when they ask to play with glue, paint, and glitter. Or because it would be so much quicker to make pancakes or wash dishes without their help.

Still, sometimes you are granted a moment's grace, where you realise that every quest of a child, no matter how messy or annoying, is an opportunity for them to learn, create, and grow.

So when Jude asked to make soup, I said "Yes".
Go get your cookbooks and a pen, now, because I know you're going to want to write this down. In a small saucepan, combine grapes, bread, blueberries, rice milk, some Cheerios, and a healthy dose of sea salt. Make up the quantities as you go.

After much stirring and tweaking, Jude decided he wanted to eat his concoction for dinner. Good mama that I am (it was actually a bit of a struggle for me), I said, "Yes". Then along came the hardest request to say yes to: "Want to try some, mommy?"
But I did. I tasted it. It was sweet. And very salty. I managed to avoid consuming any of the solid, floaty things. Not to be outdone, daddy (who is a bit squeamish about certain textures of food) tried it. Even Violet, the picky eater of the family, gamely gave it a try.

 
Here's what she thought: 

Jude asked for a "side" of spaghetti, which is what the rest of us were eating. He was so proud of his creation, and delighted that we all tried it. He'll never know that we were all lying through our teeth when we said, "Yum!" What he'll remember is one word:

Yes.

Saturday, October 16, 2010

This Cookbook

When I was 14, my mom gave me a cookbook compiled by "the wives of Rotarians", called "Among Friends: An International Collection of 500 Delicious Recipes". What I treasure most about this book is the inscription mom wrote inside the cover:

To Stephanie Rose! May you have a lot of fun trying these recipes, and may all your young dreams come true! Happy Birthday, age 14, Feb/1988, Love Mommy.  You may even be using this book for your husband and kids~ hope he likes the food!

Through the years, I've kept notes as I've cooked, and as I browsed through this cookbook this evening, I was delighted to read the little reminders of when and for whom I lovingly prepared food:


Tonight I made an old standby, "Hearty January Hamburger Soup". It's a favourite for cold, rainy evenings, and reminds me of the soup my Grandma used to make. She used stewing beef rather than ground beef, but the taste is the same. Even the most discerning (read: picky) palate in our house eats this with gusto!


A bit more of Margot's Cheese....
Here it is:

Hearty January Hamburger Soup

1 tsp. butter
1 lb. ground beef
3 medium onions, chopped
14 oz. can tomatoes (use crushed or diced, doesn't matter!)
salt, pepper, and sweet basil to taste
1 bay leaf
6 cups beef stock
3 medium carrots, sliced
3 medium potatoes, sliced
3 celery stalks, sliced
1/4 cup small pasta (seashells, elbows...or just break up spaghetti like I did tonight!)
Worcestershire and Tabasco, to taste

Heat butter and brown ground beef. Add onions, tomatoes, seasonings, bay leaf, and stock. Bring to a boil, then reduce to simmer, covered, for 1 hour.  Add remaining vegetables and cook 1 hour longer. Add pasta during the last 12-15 minutes of cooking. Correct seasonings, remove bay leaf, and serve hot!

*in order to post this, I had to go OUT of Blogger, then back in for every single photograph. After posting one, the browse button would not respond...help! Anyone? At this rate, I'll manage one post a week!

Tuesday, October 5, 2010

Guest Post: In Memory of Marjorie

Today I welcome my sister, Julie, as a guest blogger!

Since my blog, The Letter Writing Revolution, was not a suitable forum for the post I wanted to write, Stephanie graciously offered The Knitty Gritty Homestead as a space for the following post.


When I first met my husband, I was 12 years old and he was 13. We met in a hockey rink in rural Quebec and it was love at first sight. I recall seeing his mom at the rink and as the story goes, she saw me, too, and told Tim that she thought I was "cute as a button."

Fast forward 12 years..........
I met up with the man who would be my husband once again while home visiting from Whistler, BC. We dated for a few weeks and then I returned to BC. Soon after, I received a call that he was quitting his jobs, selling his belongings and moving to BC as well. We married three years later and celebrated our 11th anniversary this past June. And, as they say, the rest is history.

Very sadly, when I saw my husband's mom at the hockey rink back in 1984 what I didn't know was that she was fighting breast cancer. She passed away a year and two months later in March of 1985 when she was only 39 years old (the age I am now). When my husband and I started dating and were living in BC, we started an annual tradition of participating in the CIBC Run for the Cure.......a run/walk with all proceeds going to breast cancer research. Each year we would do the run and eventually after getting our hands on some of his mother's recipes, we started the annual tradition of making her cinnamon buns from scratch in memory and celebration of her life.

October is breast cancer awareness month and so in memory of my mother-in-law, Marjorie Graham, whom I never had a chance to meet or know, I want to share a step-by-step recipe of making her amazing (and easy!) cinnamon buns. Enjoy!

Marjorie Graham's Cinnamon Buns

You will need:
The Dough:
3 cups of white all-purpose flour (and then another 3cups or so)
2 Tbsp. quick rising yeast (if you buy the three packets that are attached, use all three)
3 cups warm water
8 Tbsp. white sugar
6 Tbsp. Crisco oil (I used light tasting olive oil)
2 eggs
1 tsp. salt
The Topping
1 lb. butter
1 kg. bag brown sugar
1/3 cup cinnamon

Creating the Buns:
1. Put water, sugar and oil in a large bowl.


2. Mix the flour and yeast together in a separate bowl and then add to the oil/water/sugar mixture, combining with a fork or spoon.

3. Add beaten egg and salt.

4. You will need to take your rings off as it's going to get messy!


4. Add at least 3 cups more of flour until you have consistency and dough doesn't stick to your hands.


5. Oil another large bowl and place dough in it. Cover with a tea towel and place in oven. No heat but turn the oven light on for 20 minutes.


6. After 20 minutes, remove from oven and knead the dough. Place back in oven, covered with tea towel, (no heat) for 20-25 minutes. Oven light remains on.


7. When you remove it after the 25 minutes, it should look like this:


8. Prepare a large surface (counter works well) with flour and dump the dough onto the surface. You will now roll out your dough into a rectangle  about 1/4 -1/2 inch thick.


My husband's grandmother's rolling pin which was probably her mother's rolling pin.
9. Now, her recipe states: "Butter well. Add lots of brown sugar and lots of cinnamon." From ten years of experimenting, my husband and I think we have found the magic balance of these three key ingredients. I use a pound of soft butter (I didn't say these were healthy!!) spread evenly over the dough rectangle. Then, sprinkle with 1 kg of golden brown sugar and I probably used about a 1/3 cup of cinnamon sprinkled over the entire piece of dough. Now, you might need an extra set of hands for this part as you are now going to roll the dough like a jelly roll.


10. Slice your roll into pieces that are about an inch and a half thick and place into greased glass pans. Pie plates work, too.Let rise in oven uncovered and no heat (oven light on, though) for 45 minutes. They should come out looking like this:

11. Remove and preheat oven to 350 degrees. Return to oven for 25-30 minutes. They are best eaten on the day they're baked and it's perfectly fine to add more butter when you eat them. I also recommend a hot pot of tea and friends and family to enjoy them with.

The finished product!
If you have any questions, do not hesitate to post them here and I will happily guide you. These are by far the best cinnamon buns I have ever eaten. Enjoy!

Wednesday, August 18, 2010

Peachy Keen

To Make One Fresh Peach Pie
3/4 cup sugar
2 Tbsp. flour
1/8 tsp. salt
1/4 tsp. almond flavouring/extract
5 cups peaches, peeled, pitted and chopped

Combine flour, sugar, and salt; toss with peaches. Add extract, and pour into a pie shell (store-bought is fine!). Dot with butter, cover with pastry, and bake at 400 degrees for 40 min.

Nothing calls to mind my summer childhoods as much as the flavour and scent of fresh peaches. I remember peeling bushels of them for my mom to make peach conserve (my dad's favourite), and peach pie (my favourite)! Now, my kids get to "help"...


Last summer mom and I joined forces to make the most of August's peach bounty. We made 18 pies to freeze and enjoy through the winter. I may have ONE left in my freezer, but all the others were enjoyed with cups of tea and the company of friends, when the warmth and flavour of summer was but a distant memory. Keep in mind that making and freezing unbaked pies may result in a slightly soggy crust! That didn't stop us from devouring all but one.


As peach season approaches, I look forward to another pie-making day with my mom, and reflect on how much my kids have grown since last August. Margot was about 6 weeks past her heart surgery in these pictures...look at her here to see what an immediate difference her surgery made! Violet was a few weeks away from a self-inflicted haircut, and Jude was old enough to start Junior Kindergarten.


I remember this time as the BEGINNING of my life as a mother of three, as I'd been so mired in getting through the months preceding and immediately following the big surgery...this was one of the first "normal" days I'd had since Margot's birth. I treasure these photos and the memories they evoke.


The last bits of pie dough are used to make "petes de soeurs" (nuns' farts...sorry if I offend; I believe this funny name originated in Quebec)...just roll it out, cover with butter, brown sugar, and cinnamon; roll up and slice, then bake till golden.


Here is my mom's peach conserve recipe, which came from my childhood best friend's mother's cookbook! This makes a very pretty Christmas gift, as it's very bright and peachy!

Anne Briscoe's Peach and Cherry Marmalade

15 peaches, peeled and chopped
4 oranges, thinly sliced and chopped (leave peels on!)
1 8 oz. jar maraschino cherries, cut into eighths
3/4 c. sugar PER 1 cup of fruit

Put peaches, oranges, juice from cherries, and sugar in a pot; simmer for about 1 hour.
Add chopped cherries and seal.
Makes 8-9 250 mL/1 cup jars.

*Remember to add cherries AFTER cooking, or they'll lose their bright red colour. I know maraschino cherries are probably carcinogenic. Omit them if you're concerned about the dye/chemicals in them. As for me, I figure if I eat half a maraschino cherry on my toast once in awhile, it's not going to do that much harm!

Tuesday, August 10, 2010

5 Ways to Love a Zucchini

Don't you just love zucchinis? The plant has leaves like an elephant's ear, tropical blossoms, and the ability to hide what's really happening under there. You'll check daily, and see nothing, nothing, then one day...kapow!

Zucchinis as big as a toddler!
1. Mmm...one of my favourite way to dispose of zucchinis is to slice them into rounds, dredge them in flour, then beaten egg, then either bread or cracker crumbs...fry them in butter and devour. Yes, if you cook them this way you'll be negating any health benefits of this lovely vegetable. And you won't regret it. This also works with green tomatoes, fresh pickerel or rainbow trout fillets, chicken strips..you name it. This is not something we eat on a weekly basis, so it's a real treat at zucchini time.

2. Grating them finely into spaghetti sauce or casserole is also a good way of using them up.

3. And then there's always:

Chocolate Zucchini Cake

1/4 cup butter
1/2 cup vegetable oil
1 3/4 cups sugar
2 eggs
1 tsp. vanilla
1/2 cup buttermilk (I use rice or soya milk)

Cream above ingredients together in a large bowl.

Then sift together:
2 1/2 cups flour
1/4 cup cocoa
1/2 tsp. baking powder
1 tsp. baking soda
1/2 tsp EACH cinnamon and ground cloves

Combine wet and dry, then stir in 2 cups grated zucchini and 1/4 cup chocolate chips.

Bake at 325 Degrees F (160 Degrees C) in a greased and floured 9"x13" pan for 45 minutes.
(I grate and store zucchini in 2 cup bags for winter baking).

4. As a treat for the chickens, I'll slice a zuke lengthwise, and they pick it clean leaving only a thin green rind.

5. Finally, the most popular way for a zucchini gardener to use up zucchini: shower your friends and acquaintances with "gifts"...leave one on their car seat when they're about to leave your house, bring them as hostess gifts to August parties, hand them to the lady who delivers your mail, the man who cleans your chimneys (yes, we get this done in August), and the guy on the street. Most people are too polite to refuse homegrown vegetables. One day we came home to find a BASKET of zucchinis left anonymously on our doorstep. I laughed and laughed at how karma works (I'd been dumping zukes on everyone I'd met for a week)...

Resisting zucchini love is futile. Surrender to the zucchini. Make friends with it. And let me know if you come up with any other ways to use the bloody things up!

Saturday, July 17, 2010

Pineapple Upside-Down Cake

My cookbook is starting to look like my mom's; recipes entitled "Lorna's Sugar Cookies", "Luscious Lenore's Lovely Ginger Cookies", and "Adam's Mom's Butterscotch Square" abound. My favourite from my mom's tattered old book was "Carole Dowdall's Pink Dessert". I can't say I have made it, or want to, but to me it is such a reflection of a time when adding Jell-o, Miracle Whip, maraschino cherries, and pistachio pudding to all salads and desserts was the norm.

Today I peeked through my cookbook for a quick recipe; the people who sold us our house were passing through the area and wanted to pop in. I always like to have something just-baked when guests arrive...in addition to the lovely, welcoming aroma that fills the kitchen, I think it's rather homey to serve something lovely with tea.

I came across this recipe for my grandma's Pineapple Upside-Down Cake; the first time I baked it was when I was in early labour with the baby-who-would-be-Jude...I remember calling my grandma for the recipe between those early, sporadic contractions!

Stephanie's Grandma's Pineapple Upside-Down Cake

1/2 cup brown sugar
1/4 cup butter
1 can pineapple rings, or one pineapple, peeled, cored, and sliced into rings.


Start by melting the butter in an 8 inch round pan; sprinkle with brown sugar, and line with pineapple rings. You may put maraschino cherries into the centres for a nice decorative touch; I try to avoid foods that have so many preservatives, archaeologists will study them in 4000 years...but it's up to you!

Sift together:
1/2 cup flour
1/2 tsp. baking powder

In a separate bowl, beat together:
2 egg yolks
2 Tbsp. pineapple juice (if using a fresh one, squeeze the extra bits through a sieve or just use orange juice!)

In yet another bowl, beat
2 egg whites (until stiff peaks form)

Then add 1/2 cup sugar to the whites.

GENTLY fold yolk mixture and flour mixture alternately into the whites mixture. Pour over pineapple in cake pan. Bake at 350 degree F for 35-40 minutes.
Allow to cool for 5 minutes, then turn onto cake platter ~ serve with whipped cream!

The topping is a delicious gooey mess of butter, brown sugar, and pineapple!


I had a bit of a tear in my eye as I baked, as when my Grandma gave me the recipe 5 years ago, she was still living in her own home, with her own cookbook. She told me this story:

When she got married, my grandma didn't know a thing about cooking. My grandpa was in love with her, and very patient and indulgent, so he didn't mind testing out her first attempts. In their early marriage, grandma would make two desserts when company was coming, just in case one didn't turn out!

One evening, when Grandpa was bringing a friend home (a man I would later meet; they were lifelong friends), she made this cake, and wrapped it in waxed paper to set in the snowbank to cool (as they had no fridge). When she went to fetch it, she found that a dog had made off with it!

Upon hearing this, Grandpa turned to his friend without missing a beat, and quipped, "That explains the big dog we saw lying dead in the ditch a ways back!"

Recipes that are handed down carry so much more than food ingredients with them. I always think that this recipe also carries the ingredients of a good marriage: honesty, patience, perseverance, optimism, and especially a good sense of humour.

My Grandma is now almost 92; she's lived without Grandpa for the past 21 years, and moved into a retirement home 2 years ago. All of her meals are now cooked for her, after about 70 years of feeding her husband, four children, and many grandchildren (all her practice paid off, and we enjoyed many wonderful meals together).

The other night, when Grandma was having dinner at my parents' house, she asked for the recipe for the meal my mom had made. When mom and dad reminded her that she doesn't have to cook anymore, it took a moment before she said, "Oh, that's right...I forgot".

Well, Grandma, I won't forget this story. It is now part of our family history. I have her story written with the recipe in my cookbook, along with "*May 14, 2005: got this recipe from Grandma - early labour activity as we waited for the arrival of our first babe!"

I encourage you to collect the recipes that accompany your family history, and write down the stories that go with them. You just might find the ingredients for a happy life.

P.S. Don't forget to enter my awesome giveaway!